Introduzione
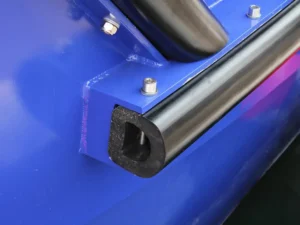
I parabordi in gomma sono un elemento fondamentale dell'industria nautica. Dall'ormeggio al trasporto da nave a nave, sono estremamente utili. Riducono i rischi di danni. E mantengono le vostre navi inattaccabili per lunghi periodi. Cosa succede se i vostri parabordi si danneggiano in modo irreparabile durante una collisione? Sostituitelo sempre con uno nuovo per ottenere le prestazioni ottimali che vi aspettate da un parabordo marino. Ma come si installano i parafanghi in gomma? Sono necessari strumenti speciali? In questa guida vi illustreremo tutti gli scenari di installazione dei parabordi marini.
Quando è necessario sostituire il parabordo marino?

Se non è stato installato il file Parafango Yokohama sulle vostre navi, può essere il momento giusto. A volte i parabordi in gomma sono già installati, ma è necessario sostituirli.
Quindi, è il momento giusto per sostituire i parafanghi Yokohama? Scopriamo i diversi segnali per la sostituzione del parafango pneumatico.
-
Diminuzione delle prestazioni
Non sempre accade, perché il calo delle prestazioni richiede anni. È necessario capire che l'assorbimento della forza di collisione da parte del parafango pneumatico è diminuito in modo significativo.
Se si nota un rapido deterioramento delle prestazioni, è bene prenderlo sul serio prima che sia tardi o che si verifichino incidenti. Potete sostituire i parafanghi in modo efficace e andare sul sicuro.
-
Durata della vita superata
Un parafango in gomma non ha un ciclo infinito di invecchiamento. Al contrario, inizia a cadere a pezzi entro 15-20 anni. Alcuni produttori prevedono un periodo di garanzia.
Se sono passati 20 anni e si nota una diminuzione delle prestazioni di un parafango pneumatico, è meglio scartarlo. E installarne uno nuovo che vi tenga al sicuro.
-
Danni irreparabili
Quando due navi si scontrano, i parabordi in gomma agiscono come prima linea di difesa. I parabordi in gomma assorbono tutta l'energia della collisione.
Quindi, in questo caso non succede nulla ai parafanghi in gomma? Sì, sicuramente. A volte si danneggiano. Se il danno è irreparabile, si dovrebbe prendere in considerazione la possibilità di sostituirli con uno nuovo dalle prestazioni migliori.
Strumenti e materiali nella lista di controllo per l'installazione dei parafanghi in gomma

Per installare un parabordo pneumatico sulla nave sono fondamentali diversi strumenti. Tali strumenti possono includere nastri di misurazione, attrezzature sicure e materiali per un'installazione perfetta.
Ecco i diversi strumenti che dovreste avere nella vostra lista di controllo.
-
Nastro di misurazione
Un nastro di misurazione aiuta a misurare la lunghezza dei parabordi di tipo D. Inoltre, misurando la distanza o l'altezza, è possibile posizionare i parabordi marini in una posizione perfetta sulla nave.
-
Punte e trapano
Il trapano è uno strumento che non può mancare quando si installano i parabordi marini. Serve a creare i fori sull'imbarcazione dove verranno fissati i parabordi in gomma. Allo stesso tempo, le punte del trapano fungono da strumenti di incollaggio che tengono insieme i parabordi in gomma e la nave.
-
Spazzola
Quando si praticano i fori, non si devono lasciare residui o detriti. Le setole rigide aiutano a rimuovere i residui e a rendere la superficie sufficientemente pulita per applicare la colla e creare i legami.
-
Compressore d'aria
Un compressore d'aria viene utilizzato nel momento in cui si pulisce il foro. È necessario utilizzarlo nel foro per eliminare la polvere e l'aria inutili. Usatelo finché non c'è più polvere.
-
Acetone
L'acetone è un altro materiale per la pulizia dei fori. L'aspetto migliore è la pulizia perfetta. Quando si versa l'acetone nei fori, questo elimina immediatamente i contaminanti e rende la superficie pulita e migliore per i materiali adesivi.
-
Cacciaviti
I cacciaviti stringono le viti in posizione e contribuiscono a un migliore incollaggio. È necessario inserirli nella lista di controllo dei materiali per ridurre la complessità del processo.
-
Materiali adesivi come la colla
Sapete perché è necessario il materiale adesivo? Serve per unire la vite al foro. I materiali adesivi dipendono in larga misura dal tipo di parabordi marini che avete. Quando acquistate la colla, verificatene la durata, il tipo e l'idoneità per i vostri parabordi marini.
Guida passo passo all'installazione dei parafanghi in gomma

Un'installazione perfetta salva la situazione. Eviterete danni futuri e otterrete prestazioni ottimali dai vostri parabordi marini. Il contrario avviene se non si presta attenzione al processo di installazione.
Ecco i sette passaggi ideali per installare un parafango Yokohama.
-
Fase 1: Misurare le dimensioni
I parabordi marini hanno dimensioni specifiche in base alla lunghezza, alla larghezza e allo spessore. Nel processo di installazione, è necessario praticare dei fori nei parabordi marini.
Al di sotto dei parafanghi del tipo D, è necessario fissare la piastra che evita danni ed elabora più velocemente l'intero lavoro. Pertanto, le misure sono necessarie per conoscere e montare le piastre di lavorazione.
-
Fase 2: foratura
È arrivato il momento di praticare i fori nei parafanghi del tipo D. È necessario disporre degli strumenti e dei dispositivi di protezione necessari. Questi possono essere:
- Trapano elettrico
- Pistola per sigillanti
- Cacciavite
- Maschera
- Guanti
A questo punto, decidete le specifiche del progetto e muovetevi di conseguenza. Ad esempio, utilizzare un tubo di perforazione adatto alla lunghezza della perforazione. Conoscere gli interstizi in cui si intende praticare il foro. Per evitare i problemi di tempo, è bene effettuare una foratura adeguata in anticipo e acquistare un parafango con caratteristiche specifiche.
Quando si esegue il foro, assicurarsi che il foro sia asciutto. In caso contrario, utilizzare metodi di asciugatura artificiale per ottenere la migliore esperienza.
-
Fase 3: Utilizzo del compressore d'aria e della spazzola
I compressori d'aria possono essere lo strumento principale per la pulizia. Con l'alta pressione dell'aria, tutti i granelli di polvere vengono espulsi dai piccoli spazi e pori del foro. Si otterrà un foro pulito.
A volte, all'interno del foro c'è ancora della polvere. Per rimuoverla, è necessario farsi aiutare dalle spazzole arrotondate con setole che vanno negli angoli dove è difficile rimuovere la polvere.
-
Fase 4: utilizzare l'acetone per una pulizia migliore
A questo punto, si può bagnare il pennello nel solvente di acetone e iniziare ad applicarlo lungo le pareti dei fori. Questo rimuoverà la contaminazione e fornirà una superficie efficace per aggiungere il materiale adesivo.
L'acetone è altamente volatile ed evapora in pochi secondi. Una volta che la superficie è pulita e asciutta, copritela con della carta. In questo modo si terrà lontana la polvere e si eviterà di pulirla di nuovo.
-
Fase 5: Regolazione della colla
A questo punto, è necessario avere in mano due cose. La prima è la colla adesiva e la seconda è la regolazione dell'indurimento per creare i polimeri e fornire migliori caratteristiche di adesione.
Prima di tutto, misurare la colla di cui si ha bisogno. Dipende dalla costruzione, dalla temperatura e dalla profondità del foro. Una volta ottenuta la giusta quantità di colla, aggiungerla alla costruzione. A questo punto, aggiungere lentamente gli agenti indurenti per ottenere risultati migliori. Entro 40 minuti, di solito tutta la colla viene utilizzata.
-
Fase 6: iniettare la colla nel foro
È il momento di iniettare la colla nel foro. Controllare se il foro è asciutto ed efficace per l'iniezione della colla. Inoltre, pulirlo di nuovo se vi si trovano materiali polverosi.
A questo punto, è possibile iniettare la colla nel foro fino a che 80% del volume è riempito.
-
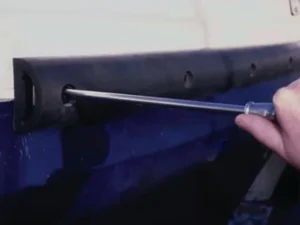
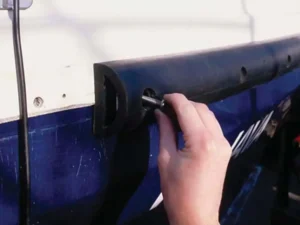
Passo 7: Inserire la vite
Dopo aver applicato la colla, non aspettare che si asciughi, perché perderebbe la sua capacità adesiva. Inserire la vite senza perdere tempo e ruotarla per fissarla in posizione. Rimuovere l'aria, se presente.
Appoggiare un oggetto pesante sull'asta della vite per creare una pressione temporanea che consenta una migliore adesione nel punto in cui si trova. Dopo qualche tempo, la vite si fisserà e creerà un legame più forte. Questo è ciò che dovete fare!
Suggerimenti per l'installazione dei parafanghi Yokohama
Non è possibile lanciarsi direttamente nel processo di installazione senza sapere di avere tutti gli strumenti e le dimensioni necessarie. Ecco alcuni consigli da seguire prima dell'installazione finale dei parabordi marini.
-
Acquistare i parabordi marini adatti.
Prima di tutto, date un'occhiata a tutti i tipi di parafanghi disponibili sul mercato. Se avete deciso per la gomma, valutate le sue caratteristiche tecniche. E assicuratevi che soddisfino le vostre esigenze di installazione.
-
Controllare se si adatta.
Prima dell'installazione, controllate la forma, le dimensioni e i materiali, come dadi e bulloni. Soddisfano i requisiti specifici? È possibile installarlo subito? Se non ci sono problemi, si può passare all'installazione.
-
Cose da sapere durante l'installazione.
Una volta installati i parabordi marini, verificare il collegamento tra il parabordo e la banchina. È necessario che il collegamento sia ben saldo. Se la superficie di ferro esposta si sta arrugginendo, è necessario adottare misure supplementari per rimuovere la ruggine. A volte è meglio applicare una vernice antiruggine che tenga lontana la ruggine.
Nota finale
Quando si sostituiscono gli airbag per il lancio di una nave, bisogna sempre considerare fattori quali:
- Qualità
- Costruzione
- Materiale
- Costo
- Garanzie
Un produttore ideale offre tutte le opzioni della gamma sopra indicata. Conoscete un fornitore di questo tipo? Se non lo conoscete, non preoccupatevi. Abbiamo Jerry Borg Marine con anni di esperienza nel settore dei parafanghi. Produciamo solo parafanghi di altissimo livello. Nessun compromesso sulla qualità e garanzie di anni vi fanno stare tranquilli. Scoprite cosa abbiamo di speciale per voi.
