Introduction
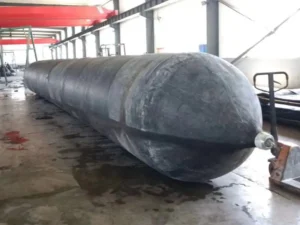
Ship airbags are one of the most vital components of an ocean voyage. These have different names. Such as ship launching airbags, airlift bags, salvage bags, or roller bags. These bags aim to launch marine vessels, salvage stranded ships, and move sunken ships.
Such is the importance of these bags that no ship goes into water without marine airbags. Hence, these are as important as the captain of the boat.
These bags are of high quality, heavy-duty synthetic tire cord layers. But the risk of puncture is inevitable when hit by rocks or pointy objects.
Moreover, these bags have an inner and outer rubber layer and come in a cylindrical balloon shape.
Since these bags are so critical, preparing them for emergencies is vital. Thus, the ship crew must know how to repair marine airbags. We will discuss the fixing technique of ship airbags in this article.
So, let us get started!
Repair Tools

Only the right tools can help you in an emergency; even your skill is only helpful if you have the right tools. Thus, first, you must prepare a list of repair tools to fix the runner airbag.
You are a soldier without a gun if you do not have a tools kit on the voyage.
So, your tool kit must contain the following tools to help you repair marine airbags.
- Angle grinder: It helps in grinding the incision on the punctured airbag. These are also known as side grinders and disc grinders. It is a handheld power tool available across famous superstore chains. Angle grinders come in handy when you are going to repair a marine rubber airbag.
- Brush: Brushes are to clean the marine airbag surface. You can buy a brush from any store. Many sizes and qualities of brushes are available. So, you can buy the one that suits your requirements.
- Hydraulic Jack: The hydraulic jack is a major player in repairing marine airbags. It helps to press and hold the rubber sheet on the heating plate. Fixing the runner’s airbag is impossible without a hydraulic jack.
- Heating plate: These plates are vital as they support during vulcanised incisions. The purpose of the heating plate is to melt and fix the rubber through the punctured hole. Thus, you cannot repair marine airbags without another tool.
- Sandbag: Sandbags help keep the ship balanced. You can place them between marine airbags and brackets for great safety. You can easily find these from an online store or your nearby supermarket.
- Bracket: These create pressure by pressing the heating plate with rubber patches. Brackets come in different sizes. And you can buy small to large sizes, as they will support the repair of marine salvage airbags.
- Steel plates: To maximise pressure during repair, press steel plates to the hydraulic jack. It would help if you placed it on a heating plate. These are available in your nearby store.
- Needle with cords: At last, large-sized needles must be on list when repairing ship airbags. Buy the large needle, which will cut through a sturdy rubber airbag.
- Temperature controller: A temperature controller is not mandatory while repairing marine rubber airbags. Still, these are handy devices so you can measure the temperature of the heating plate. It helps to avoid overheating of the pad.
Repair Materials

Besides, add the following material within your ship launching airbag repair kit.
- Rubbers: Generally, there are three types of rubbers to consider. Surface rubber, cord rubber, and glue rubber. As the names suggest, you can understand the purpose of each one of these rubbers.
- Glue: Another vital component of the kit is the glue. However, mixing with gasoline requires a weight ratio of 1:5 (glue to gas). Thus, cut glue rubber into small pieces before mixing these with gasoline.
- Isolating cloth: Hence, isolating cloth helps to remove rubber patches from heating plates.
Steps to Repair Marine Airbags
Once your repair kit is complete, you are ready to hit the waters. God forbid, if you come across a punctured rubber airbag. Follow the steps mentioned in the coming lines to repair your airbag.
We have mentioned the repair process in simple steps for your easy understanding. So, let us get started with the repair of the ship airbag.

-
Step 1: Cleaning
First of all, you must clean the rubber airbag. Removing any dust, sand, and oil from the airbag’s surface is vital. You can only get the best repair that is sand-proof.
After cleaning the surface, dry it and place it in the workplace. Likewise, you must ensure that the workplace is also tidy. Moreover, ensure your repair workplace is dry and away from snow or rain.
Before moving on to the next step, ensure the marine airbag is dry, as is your repairing kit.
-
Step 2: Damaged Area Identification
The next step is to identify and mark the damaged area. Likewise, ensure you go through the whole airbag and check for every single damaged part.
For better repair, you can expand the bag from the centre outwards up to 20-26 cm.
Moreover, the expansive range depends on the size of the damaged area. Thus, check the marine salvage airbag with great care to find any hidden damaged areas.
-
Step 3: Repair
The real work starts here. Once you have marked the damaged parts of the bags, you can move to begin the repair process. You can follow the below points to complete the repair.
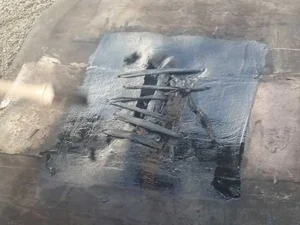
- Sand the bag’s surface with the help of a hydraulic jack until cords become visible. But, please do not damage the cables; sand it to the point where the cords lay bare.
- You need a needle and cord layer for suturing if the damaged area has long cracks. The recommended sewing needle position is around 2-3 cm from the damage. Likewise, use a maximal 10cm distance between stitches for the best outcome.
- Now, use gasoline to wash the damaged part and put it to dry.
- Once the gasoline is dry, you must paste a special glue on the damaged part. Generally, this is a mixture of raw rubber and gasoline in a ratio of 1:8 (1 part of rubber needs 8 pieces of gasoline). You can paste this glue on the rubber airbag surface with a brush.
- Cut a structured layer of the same material as the airbag. Patch size depends upon the size of the damaged part. But, ensure that the rubber belt has a thickness of 1mm. At the same time, it should cover the damaged area over 1 cm around the crack.
- Place the layer on the damaged part. The general formula for the patch is N+1+1, where N represents the layers of damaged airbags. For instance, if you have a 6-layer cut, the patch must have 7 layers of cord rubber and one layer of surface rubber.
- Ensure that you brush and clean each surface before stacking them together with the help of glue.
- Place the assembled patch on the cut and remove any bubbles in the layer.
-
Step 4: Thermal Vulcanization
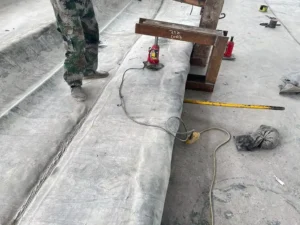
Next, vulcanize the area by placing the airbag into the bracket. Adjust the airbag so the patch is right under the jack for proper press.
Now, you must press the hydraulic jack on the rubber by keeping a pressure of 0.5-0.6 MPa. Likewise, the recommended temperature of the controller should not exceed 160°C.
Turn off the power once the temperature reaches 140°C.
After waiting 30 minutes, turn on the power and let the temperature go to 140°C again. Now let the temperature fall to 50°C before releasing the airbag.
-
Step 5: Inspection
The final step is to inspect the repaired airbag to confirm no leakages are there. You can inflate the bag and test if it needs any further repairs. But, do not inflate the bag while it is hot; let it cool to room temperature.
Jerrybog Marine: The Ultimate Solution
Rain or shine, when it’s about high -end marine airbags, you must consider something reliable and long lasting. For that, Jerryborg Marine is the one-stop-shop.
Here, you’ll find top quality marine airbags, ensuring your marine equipment is fettle and organised. Not only that, Jerryborg marine offers an effective solution to your marine floating capacity testing by giants of the marine industry.
Jerryborg marine caters in-house marine products manufacturing from airbags to hoes and fenders and many more. Get the most of your marine equipment from Jerryborg. Happy Cruising!
Parting Thoughts
Ship airbags are lifelines when it comes to marine life. They support ships to park, launch, and salvage stuck ones. Thus, using marine airbags is necessary while setting the sail.
Since the ocean is full of surprises, there are fair chances that your rubber airbag can break. But, you can salvage your damaged airbag using brushes, hydraulic jackets, and sandbags.
Cleaning the airbag, sewing the cuts, pasting rubber patches, and vulcanizing is a must. In this way, you can continue your travel through rough waters.
Although it may seem simple, you must take care while repairing airbags. One significant point of concern is getting the damaged part cleaned from sand and oil.
We hope you enjoyed reading and are now wholly equipped to repair your marine airbag. Please leave feedback in the comments section.
